Affinity Photo Tutorial is a strong and affordable image editor. It has the potential to participate with Photoshop for many informal and professional users. This has a customizable interface, well- designed, and produces most editing tasks quickly thanks to features in hardware acceleration. Further, painting and drawing are good choices in it. The vector drawing device is appropriate with Affinity Designer. When working with RAW photos may be improved in speed and responsiveness. To deter most users it is not a big issue. Affinity Photo is the latest development. Yet the team behind it continuous working on the latest features and bug fixes.
What is Affinity Photo Tutorial?
It is a photo editor. Like Photoshop, it is enabled to perform the very latest image editing tasks, yet at a fraction of the cost of Photoshop. Affinity Photo Tutorial is also for advanced editing for most photographers. This is a part of the Affinity Suite which involves the Affinity Publisher and Affinity Designer. Also, it is not slow. And we have continuously compared it with the other opposite of Photoshop. It is slightly dimmed by Adobe, because of its familiarity and durability. In its advanced version adds hardware acceleration for better performance on the linked layers, Windows, and custom interface. Moreover, some operation is slow and the user interface yet lacks some form of that are other competitors.
Price of Affinity Photo Tutorial:
This is obtainable on the Mac App Store, in Windows 10 from the Microsoft Store, as a website install, at once the cost is $49.99. Also, the pricing is not upgrading, yet you can download the software on the many laptops you have; Adobe limits generative Cloud apps to two machines. The free trial for 90 days gives you the cost of an email address that you have, the app is Serif Photos. For the upgrade process through several Laptops, we like desktop software to be obtainable via the app stores. Whatever, when you run the first project, you view the Welcome panel that provides sample photos, links to Facebook and Twitter content, and tutorials.
Further, we gain the overlay packs like Snow, Rainbow, and Fog effects with which your products are registered. The links open a dialog box in a new document where you set the image properties such as type and size. Serifs are not involved in the automatic tour of the interface that offers the multiple competing photo app, including Lightroom, Skylum Luminar, and Corel PaintShop Pro.
In The Licence What is included?
As a private single person, you enable to install and download the app on the Laptops that you own. Moreover, if you purchase Affinity Photo for Windows and you have your own, you require to buy the Mac version of the software. Whether you obtain the Affinity Photo for iPad then you require a different license for that too. If you obtain to understand task management then you study my article Microsoft To-Do which guides you completely.
Key Features of Affinity Photo Tutorial:
- merge HDR
- RAW editing guide most editing files
- View stitching
- Stacking Focus
- Interface Elements are hide
 Editing Vector
- previews of thumbnail
- Provide the professional photo quality
- Unlimited snapshot and history
- Filters of Lightning
- Most common settings you used in it are safe at present
- On import and export support various file types
- To simplify the user interface, task-focused workspaces
- For filter modifications the real-time filters are present
- Modes of blend
- At once cost pay then no subscription
- Image editing is 360-degree
- For non-destructive workflow, you have the layer-based editing
- Corrections of Lens
- Processing Batch
- Import Photoshop documents involving the smart objects – PSD Files Editing guide
 Editing Vector
Installing and Setting The Affinity Photo Tutorial:
The Install size in App Store means Mac is about 349MB. Behin installing, Around 1GB of disk space takes up in Affinity Photo. While comparison with Photoshop takes 2GB.
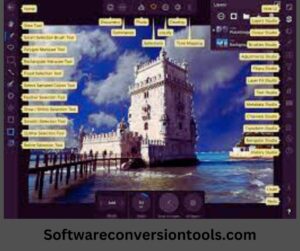
User Interface:
The user interface in Seirf has been divided into a separate task-oriented workspace known as the personas. It means you can only view the icon related that what is working. Personas are :
Image:
most of the image enhancement process is used
Liquify:
pixel manipulation is utilized, such as a person giving a smaller face and more visual check bones, or generating creative and artistic effects.
Develop:
the RAW images are edited for pre-processing pace previous you take your image into Photo persona.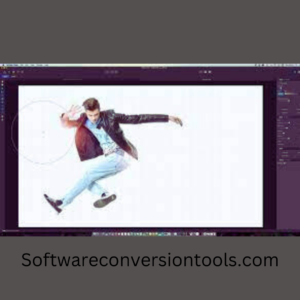
Mopping Tone:
It is for generating HDR images, utilizing the local contrast, mopping tone, and further so on.
Export:
For exporting your image to several patterns, sizes, and once slices have the Export Persona.
As in Photoshop, you save the custom workspace but you do not do this. While Affinity Photo is for activated panels and advanced settings.
Design, Keyboard Shortcuts, and Clicks:
Under Affinity Photo> Preferences> Keyboard Shortcuts is designed the keyboard shortcut. At the given internal and set the undo-redo conditions under Preferences you also configure autosave. Further, you are enabled to control how many resources it uses.
Workflow of Photo Editing:
Affinity Photo is not the workflow of photo editing such as Capture One Pro, Lightroom, Luminar, etc. Photoshop and Corel PaintShop Pro are compared with them for photo retouching, image blending, and focus stacking.
It is Non-destructive?
YES, Affinity Photo Tutorial is non-destructive in the point that you save the image in another pattern than the real ones.
RAW Transform- The Develop Persona:
When you open the RAW file you will delete the Develop Persona, and this is equal to Adobe Camera Raw. The only for Raw processing is Develop Persona, such correct basic exposure problems and lens correction. In destructive editing everything you do in it. When you do the basic exposure adjustment in your raw files then in the Photo Persona you do the rest of the work. Also, some of the reviews say that noise reduction is only obtainable in the Develop Persona yet it is not true. In Photo Persona we apply the noise reduction in a live filter or a normal filter.
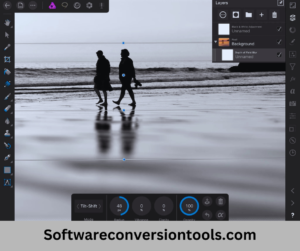
Adujusment of Images- The Photo Persona:
In the right side studio panel, there is the adjustment of images. Further, all the adjustment layer panels for increasing tones and colors such as highlights, levels, shadow adjustment exposure, contrast, and HSL adjustments are in it. Also, it is where the layers panel and create layer masks.
Tools Selection:
Its work is general. The straight forward we use Selection Brush Tool and we generate a quick selection. Affinity Photo also guides snap to edges, and further adjustment. The refine selection tool is in it. Also, the unwanted object is also deleting init.
Tools for Photo Merge:
Some tools that are in Photo Merge are:
- HDR Merge
- Focus Merge
- Tasks that are automatic
- Panorama Stitching
- Your Images Outputting
Support and Tutorials:
For Affinity Photo there is an enhanced number of Tutorials, involving Photogarphy-RAW. Moreover, we compare it with other Photo editing software, such as Photoshop.
Desktop and iPad Version in Affinity Photo:
Whether we want to edit images on your iPad, there Affinity Photo dedicated version to the iPad also. Further, it needs different licenses that price $19.99 and in the app store, it is obtainable. For iPad works on iPad Pro, iPad Mini 5, and so on on the Affinity Photo.
Pros:
- Editing Layer
- RAW Camera file guide
- Raster and vector images work
- Customization and powerful brush selection
Cons:
- Photo adjustment tools are inferior
- Nothing in the design templates
- Photo management and import tools are lack
- Noting standard and obtuse interfaces sometimes
Final Review of Affinity Photo Tutorial :
In the above, we discuss it completely and finally, the conclusion is that it is a strong image editing application that offers a great balance of features at a professional level and very affordability. Rather, the RAW handling and rendering are not satisfying high-end photographers, yet for most of the users, All of the image editing features are controlled in it, because of its capability. This is very affordable at once cost and really the bit argues against it.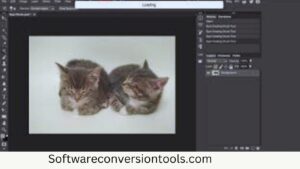
Whether we see free software that is completely free like Photoshop GIMP and the Pixelmator PRO, they are not professional enough for the requirements of the photographer. While Affinity Photo Tutorial is very well about its features and if you use it and realize its benefits.
Most Frequently Asked Questions:
Q: Whether it is good for beginners that use Affinity Photo?
The users of Affinity Photo say that it is very easy than Photoshop. But they are probably the same in difficulty. Further, if not known how to use Photoshop then may be possible that initially, you learn very slowly.
Q: It is really good if we use the Affinity?
YES, it is really good for use. This is a strong vector graphic design software that provides the latest tools and quick performance. Also, the customization choices. Simply, we use it.
Q: If we compare Affitny Photo and Lightroom which is best?
If we compare both of them then Affinity has a little edge above Lightroom means editing. Lightroom has everything but the features are present in the Affinity Photo which are absent in the Lightroom. Affinity Photo is more effective than Lightroom.